Installing MixPanel
Welcome to installation process of MixPanel application. Once you have download the package of application, unzip the all files to your web servers root folder or where do you want to install.
To install HYIP Manager MixPanel, first, download the “Script MixPanel” file from the Downloads page in your CodeKine account.

Your CodeKine account > Downloads
1. Check that the script is in .ZIP before beginning the upload.

Your Download > HYIP_Manager_MixPanel.zip
2. Upload HYIP_Manager_MixPanel.zip file via FTP or File Manager to the directory where you will install the MixPanel Script.

Your Hosting > CPanel >File Manager
Technical Note:
You can upload the script to your server using an FTP client (such as FileZilla, WinSCP, or any preferred tool) or through your hosting panel’s File Manager. There are two possible methods:
-
Option A – Upload the .ZIP file (recommended):
Upload theHYIP_Manager_MixPanel.ziparchive directly to your installation directory. Make sure your FTP client is set to Binary mode (or Auto, which will detect.zipfiles as binary automatically). After uploading, use your hosting File Manager (or SSH access, if available) to extract the archive on the server. -
Option B – Upload extracted files:
Alternatively, you can extract the contents ofHYIP_Manager_MixPanel.zipon your local computer and then upload all the extracted files via FTP. In this case:-
Text-based files (
.php,.html,.css,.js) transfer correctly under ASCII mode. -
Images and other non-text files (
.jpg,.png,.gif, etc.) should be transferred in Binary mode.
Most FTP clients manage this automatically if set to Auto.
-
💡 Tip: Using Option A (uploading the ZIP) is faster and reduces the chance of errors, because the archive is extracted directly on the server with the correct file structure and permissions.
3. It will have been uploaded to the root directory of the website as shown below.

Your Hosting > CPanel >File Manager (Check Root Directory)
4. Proceed to unzip your script in the root directory, this process will write some files to work the script correctly.
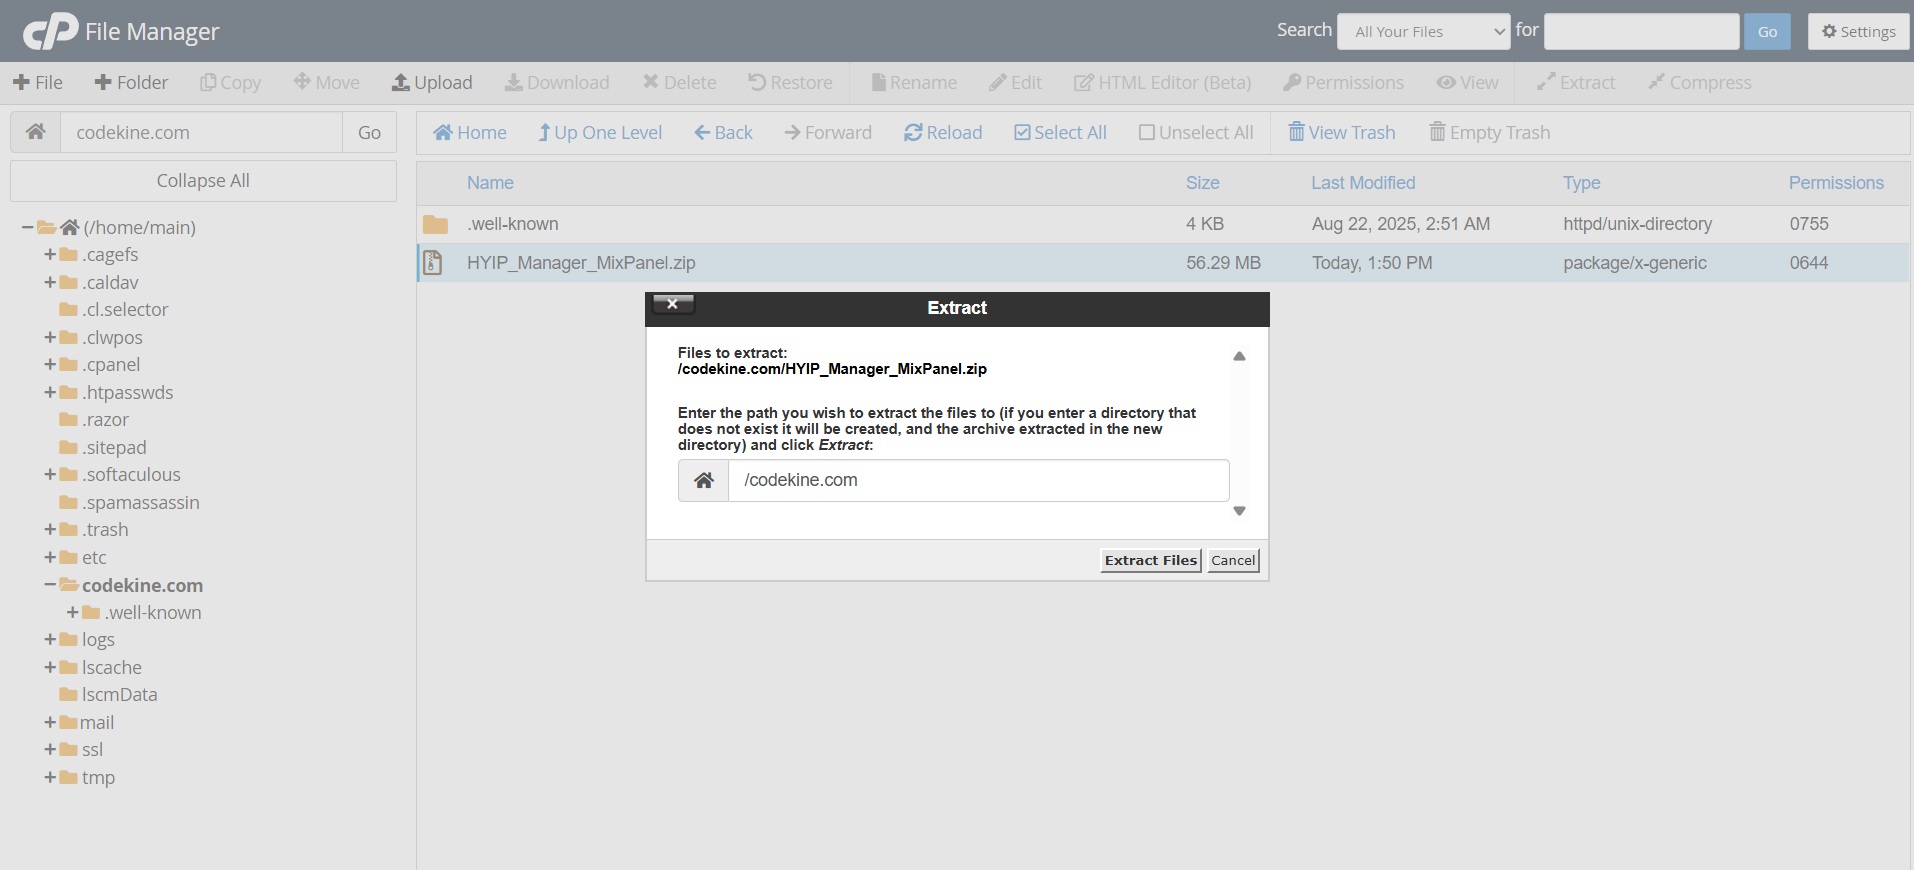
Your Hosting > CPanel >File Manager (Unzip in Root Directory)
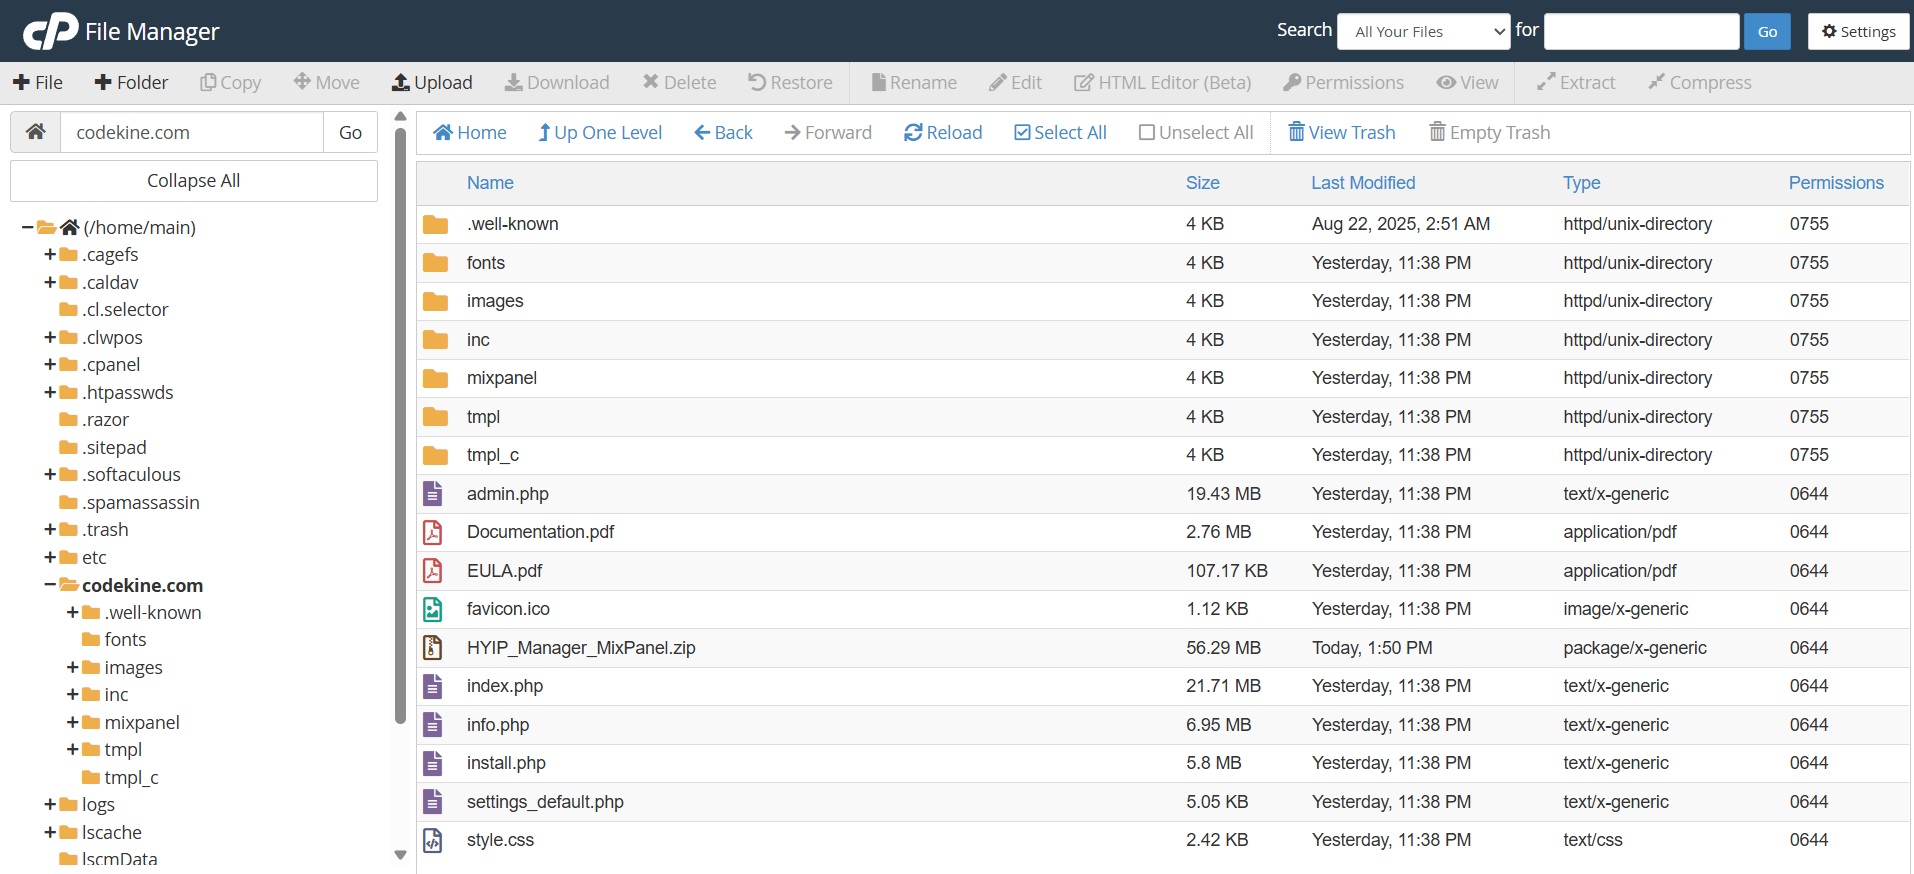
5. To see the files of your script in the root of your domain in the following way.
Installation note:
Also if you want into main-domain or sub-domain, then move all files from ‘public‘ folder to ‘public_html‘ or ‘www‘ directory based on your server folder structure.
File Upload into Server: First of all, upload all folder and files into yor server as per below folder structure. Then change these folders tmpl_c, settings_default.php permission to 775. Sometimes base on server 775 permission not works, so you may set 777 and try out.
Step One: Launch the Installer
Navigate to your domain and append /install.php to the URL to begin the installation wizard of your script.
Example: your-domain.com/install.php
This step initializes the smart installer that guides you through the process with an intuitive, user-friendly interface.

If you encounter any issues while running the installer, please make sure that your server meets all the required system requirements before proceeding > Server Configuration
Step Two: Configure Your Database & Admin Access
The installer will prompt you to enter your database connection details:
-
Database Name
-
Database User
-
Database Password
Once completed, you’ll also set your administrator email and administrator password. These credentials will serve as the master access to your script’s control panel.
Finally, at this stage, you’ll be asked to enter your license key (previously purchased). This ensures your installation is uniquely validated and ready for activation.

Step Three: License Activation & Domain Linking
After entering your license, click on Install. A confirmation modal will appear requesting you to activate your license on the current domain.
-
By clicking Confirm, the system automatically validates and binds your license to this domain.
-
Once successfully activated, your license becomes permanently linked, ensuring security and authenticity of your script installation.
This process guarantees that your project is officially verified and fully functional.

Step Four: Final Confirmation & Project Setup
Upon successful activation, a completion screen will appear confirming that the installation was executed flawlessly. Here, you’ll see a summary of your project details, confirming that your database, admin credentials, and license are correctly configured.
Congratulations — your script is now installed, activated, and ready to power your investment platform with speed, security, and scalability.


